Category Archives: Textile World

Sweatshirt Stitching Secrets: Crafting Comfort and Style

Sweatshirts are a quintessential part of casual wear, beloved for their comfort, warmth, and versatility. Whether you’re lounging at home, heading to the gym, or out for a casual day, a well-crafted sweatshirt can be both a style statement and a comfort staple. This guide dives into the secrets of sweatshirt stitching, providing tips and techniques to craft a sweatshirt that combines comfort and style seamlessly.

The Appeal of Sweatshirts

Before delving into the technical aspects of crafting a sweatshirt, it’s important to understand why sweatshirts hold such a special place in our wardrobes:

  • Comfort: Sweatshirts are made from soft, plush fabrics like fleece and French terry, offering warmth and coziness.
  • Versatility: They can be dressed up or down, making them suitable for various occasions.
  • Durability: High-quality sweatshirts are long-lasting, retaining their shape and softness over time.
  • Ease of Care: Most sweatshirts are machine washable and require minimal maintenance.

Choosing the Right Fabric

The foundation of a great sweatshirt is the fabric. Here are some popular options:

  • Fleece: Known for its warmth and softness, fleece is a synthetic fabric that mimics the insulating properties of wool.
  • French Terry: A type of knitted terry cloth fabric with loops on one side and a smooth surface on the other. It’s lighter than fleece and offers good breathability.
  • Cotton Blend: Often combined with polyester, cotton blends provide a balance of comfort, durability, and stretch.
  • Sweatshirt Knit: Specifically designed for sweatshirts, this fabric often includes a bit of spandex for added stretch and comfort.

When selecting fabric, consider weight (measured in GSM), stretch, and color. High-quality fabrics ensure a comfortable, durable sweatshirt.

Essential Tools and Materials

To craft your sweatshirt, you’ll need the following tools and materials:

  • Pattern: A sweatshirt pattern or a favorite sweatshirt to use as a template.
  • Fabric: Your chosen fabric type and amount based on the pattern.
  • Sewing Machine: Equipped with a ballpoint needle for knits.
  • Thread: Polyester thread for strength and flexibility.
  • Scissors: Sharp fabric scissors for precise cutting.
  • Pins or Clips: To hold fabric pieces together without damaging them.
  • Ribbing: For the cuffs, waistband, and neckline.

Preparing Your Fabric

Before starting, it’s crucial to prepare your fabric properly:

  1. Pre-Wash the Fabric: Pre-washing removes any sizing and prevents shrinkage. Use a gentle cycle and air dry to maintain fabric quality.
  2. Lay Out the Pattern: Place your pattern pieces on the fabric, aligning the grain lines correctly.
  3. Cut Accurately: Use sharp fabric scissors to cut out the pieces, ensuring smooth and even edges.

Stitching Techniques for Sweatshirts

1. Seaming

Sweatshirt fabric can be thick, so proper seaming techniques are vital:

  • Straight Stitch: A basic straight stitch works well for most seams. Set your stitch length to 3-4 mm.
  • Zigzag Stitch: Useful for areas that need stretch, such as armholes. A narrow zigzag stitch can also finish edges.
  • Overlock Stitch: If you have a serger, use it for a professional finish that trims and encases the seam allowance simultaneously.

2. Topstitching

Topstitching adds a decorative touch and reinforces seams. Use a longer stitch length (about 4 mm) for topstitching. It’s especially useful around the neckline, cuffs, and hem.

3. Hemming

Hemming ensures a neat finish at the bottom edge of the sweatshirt and sleeves:

  • Twin Needle: Creates a clean, stretchy hem. Ideal for finishing sleeves and the bottom hem.
  • Coverstitch Machine: If available, provides a professional hem finish.
  • Simple Folded Hem: Fold the edge twice and sew with a zigzag stitch for a simple and effective hem.

4. Ribbing

Ribbing is used for cuffs, waistband, and neckline to provide stretch and fit:

  • Cut Ribbing: Cut ribbing pieces slightly shorter than the edges they will be attached to for a snug fit.
  • Sew Ribbing: Attach the ribbing by stretching it slightly as you sew to match the fabric edge.

5. Sleeve Insertion

There are two methods for inserting sleeves:

  • Set-In Sleeves: Sew the shoulder seams, then sew the sleeve into the armhole, and finally, sew the side seam and sleeve seam in one continuous line.
  • Flat Method: Sew the sleeve to the armhole while both pieces are flat, then sew the side seam and sleeve seam together.

Advanced Techniques

For those looking to add more style and functionality to their sweatshirts, consider these advanced techniques:

1. Pockets

Adding pockets enhances the functionality of your sweatshirt. Options include:

  • Kangaroo Pocket: A large pocket on the front, typical of hoodies.
  • Side Seam Pockets: Hidden within the side seams for a cleaner look.
  • Patch Pockets: Sewn onto the outside for a more casual appearance.

2. Hood Construction

Adding a hood can provide extra warmth and style:

  • Cut the Hood Pieces: Based on your pattern, cut two hood pieces and sew them together along the curved edge.
  • Attach the Hood: Pin and sew the hood to the neckline of the sweatshirt.
  • Finish the Edge: Hem the front edge of the hood or add a drawstring casing.

3. Decorative Elements

Enhance your sweatshirt with decorative elements:

  • Embroidery: Add monograms, logos, or decorative designs.
  • Appliqué: Stitch on fabric shapes or patches for a unique look.
  • Color Blocking: Use contrasting fabric pieces for a bold, modern appearance.

Tips for a Professional Finish

1. Maintain Even Tension

Consistent tension is crucial for uniform stitching. Adjust the tension settings on your sewing machine to accommodate the thickness of sweatshirt fabric.

2. Use a Walking Foot

A walking foot helps feed the fabric evenly through the machine, preventing stretching and shifting.

3. Test Stitches on Scraps

Before sewing the actual garment, test your stitches on fabric scraps. This allows you to adjust settings for optimal results.

4. Press Seams Carefully

Sweatshirt fabric can be thick and tricky to press. Use a pressing cloth and a low heat setting to press seams gently, ensuring they lie flat without stretching or burning the fabric.

5. Trim Excess Bulk

Trim excess fabric from seam allowances to reduce bulk, especially around curves and corners.

6. Finish Raw Edges

While sweatshirt fabric doesn’t fray, finishing raw edges with a serger or zigzag stitch provides a clean, professional look and added durability.

Conclusion

Mastering the art of sweatshirt stitching involves understanding your materials, using the right techniques, and paying attention to details. With the right tools and a bit of practice, you can create a stylish, comfortable, and durable sweatshirt that stands out. Whether you’re a seasoned sewer or a beginner, the tips and tricks provided in this guide will help you achieve a professional finish. Embrace the creative process and enjoy the satisfaction of crafting a cozy, custom sweatshirt tailored to your style and needs.

Mastering the Art of Fleece Jacket Stitching: Tips and Tricks

Fleece jackets are a beloved staple in many wardrobes due to their warmth, comfort, and versatility. Crafting your own fleece jacket can be a rewarding experience, allowing for personalization and a perfect fit. This comprehensive guide will walk you through the essential steps, techniques, and tips to master the art of fleece jacket stitching, ensuring a professional and stylish result.

The Benefits of Fleece Jackets

Before diving into the stitching techniques, it’s important to understand why fleece jackets are so popular:

  • Warmth: Fleece is an excellent insulator, trapping heat and keeping you warm.
  • Lightweight: Despite its warmth, fleece is light and comfortable to wear.
  • Breathability: Fleece fabric allows moisture to escape, preventing overheating.
  • Durability: High-quality fleece is resistant to pilling and wear.
  • Versatility: Suitable for various activities, from casual wear to outdoor adventures.

Choosing the Right Fleece Fabric

The success of your fleece jacket project starts with selecting the right fabric. Here are the main types of fleece to consider:

  • Microfleece: Thin and lightweight, ideal for layering.
  • Polar Fleece: Thicker and warmer, great for standalone jackets.
  • Sherpa Fleece: Features a fluffy texture, providing extra warmth and a cozy feel.
  • Stretch Fleece: Contains spandex for added flexibility, perfect for active wear.

When choosing fleece, consider the weight (measured in grams per square meter or GSM), texture, and color. Opt for high-quality, anti-pill fleece to ensure durability.

Essential Tools and Materials

To get started, you’ll need the following tools and materials:

  • Pattern: A fleece jacket pattern or an existing jacket to use as a template.
  • Fabric: Fleece fabric in your chosen type and color.
  • Sewing Machine: Equipped with a ballpoint needle to handle fleece.
  • Thread: Polyester thread for strength and flexibility.
  • Scissors: Sharp fabric scissors for cutting fleece.
  • Pins or Clips: To hold pieces together without damaging the fabric.
  • Zipper: A separating zipper for the front closure.
  • Interfacing: Optional, for reinforcing areas like collars and cuffs.

Preparing Your Fabric

Before you start cutting and sewing, it’s essential to prepare your fleece fabric:

  1. Pre-Wash the Fabric: Pre-washing the fleece helps to remove any manufacturing residues and prevent shrinkage. Use a gentle cycle and air dry to maintain the fabric’s quality.
  2. Lay Out the Pattern: Place your pattern pieces on the fabric, making sure to align the grain lines and the direction of the nap (the fabric’s texture direction).
  3. Cut with Precision: Use sharp fabric scissors to cut the fleece, ensuring smooth and even edges.

Stitching Techniques for Fleece Jackets

1. Seaming

Fleece is relatively easy to sew, but proper seaming techniques ensure a professional finish:

  • Straight Stitch: A basic straight stitch works well for most seams. Set your stitch length to 3-4 mm to allow for flexibility.
  • Zigzag Stitch: For areas that need more stretch, such as cuffs and hems, use a zigzag stitch.
  • Serger: A serger machine can finish edges and sew seams simultaneously, providing a clean, durable finish.

2. Topstitching

Topstitching adds a decorative touch and reinforces seams. Use a longer stitch length (about 4 mm) for topstitching fleece. It’s especially useful around the collar, cuffs, and zipper placket.

3. Hemming

Hemming fleece requires careful attention to prevent bulky edges:

  • Twin Needle: A twin needle creates a clean, stretchy hem. Use it for sleeves and the bottom hem.
  • Coverstitch Machine: If available, a coverstitch machine provides a professional hem finish.
  • Simple Folded Hem: Fold the edge twice and sew with a zigzag stitch for a simple and effective hem.

4. Zipper Installation

Installing a zipper in a fleece jacket can be challenging but achievable with the right technique:

  • Choose the Right Zipper: A separating zipper is necessary for jackets. Select one that matches the length and color of your jacket.
  • Stabilize the Fabric: Use interfacing along the zipper seam to prevent stretching and distortion.
  • Pin and Sew: Pin the zipper in place and sew with a zipper foot. Topstitch around the zipper for a finished look.

Advanced Techniques

For those looking to add more flair to their fleece jackets, consider these advanced techniques:

1. Pockets

Adding pockets enhances the functionality of your jacket. Options include:

  • Patch Pockets: Sewn onto the outside of the jacket.
  • In-Seam Pockets: Hidden within the seams, providing a cleaner look.
  • Zip Pockets: For added security, use zippers to close the pockets.

2. Hood Construction

A hood can add extra warmth and style. Follow these steps:

  • Cut the Hood Pieces: Based on your pattern, cut two hood pieces and sew them together along the curved edge.
  • Attach the Hood: Pin and sew the hood to the neckline of the jacket.
  • Finish the Edge: Hem the front edge of the hood or add a drawstring casing.

3. Binding and Trim

Using binding and trim can add a decorative element:

  • Binding: Apply bias tape or self-fabric binding to the edges for a polished finish.
  • Trim: Add decorative trim or piping along seams and edges.

Tips for a Professional Finish

1. Maintain Even Tension

Consistent tension is crucial for uniform stitching. Adjust the tension settings on your sewing machine to accommodate the thickness of fleece.

2. Use a Walking Foot

A walking foot helps feed the fabric evenly through the machine, preventing stretching and shifting.

3. Test Stitches on Scraps

Before sewing the actual garment, test your stitches on fabric scraps. This allows you to adjust settings for optimal results.

4. Press Seams Carefully

Fleece can melt or become misshapen with too much heat. Use a pressing cloth and a low heat setting on your iron to press seams gently.

5. Trim Excess Bulk

Trim excess fabric from seam allowances to reduce bulk, especially around curves and corners.

6. Finish Raw Edges

While fleece doesn’t fray, finishing raw edges with a serger or zigzag stitch provides a clean, professional look and added durability.

Conclusion

Mastering the art of fleece jacket stitching involves understanding your materials, using the right techniques, and paying attention to details. With the right tools and a bit of practice, you can create a stylish, comfortable, and durable fleece jacket that stands out. Whether you’re a seasoned sewer or a beginner, the tips and tricks provided in this guide will help you achieve a professional finish. Embrace the creative process and enjoy the satisfaction of crafting a cozy, custom fleece jacket tailored to your style and needs.
Cozy Couture: Stitching the Perfect Fleece Hoodie Top

In the realm of comfort and style, the fleece hoodie stands as an iconic staple. Whether lounging at home, hitting the gym, or running errands, a well-made fleece hoodie offers unparalleled coziness and versatility. Crafting your own fleece hoodie allows for personal touches that can transform this everyday garment into a unique piece of cozy couture. This detailed guide explores the techniques, trends, and tips for stitching the perfect fleece hoodie top.

The Appeal of Fleece Hoodies

Fleece hoodies have long been favored for their softness, warmth, and casual appeal. The fleece fabric, made from synthetic fibers like polyester, mimics the insulating properties of wool without the itchiness. Its lightweight, breathable nature makes it perfect for layering, while the hoodie design adds an extra layer of warmth and style.

Essential Techniques for Crafting a Fleece Hoodie

Creating a fleece hoodie involves several key steps and techniques, from selecting the right fabric to mastering stitching methods. Here’s a comprehensive look at the process:

1. Choosing the Right Fleece Fabric

The type of fleece fabric you choose significantly impacts the comfort and appearance of your hoodie. Common types include:

  • Microfleece: Thin, lightweight, and breathable, ideal for layering.
  • Polar Fleece: Thicker and warmer, perfect for standalone wear.
  • Sherpa Fleece: Soft and fluffy, excellent for added warmth and texture.

When selecting fleece, consider its weight (measured in grams per square meter, or GSM), texture, and color. Opt for high-quality, anti-pill fleece to ensure durability and longevity.

2. Gathering Tools and Materials

To get started, you’ll need the following tools and materials:

  • Pattern: A hoodie pattern or a favorite hoodie to use as a template.
  • Fabric: Fleece fabric in your chosen type and color.
  • Sewing Machine: Equipped with a ballpoint needle to handle fleece.
  • Thread: Polyester thread for strength and flexibility.
  • Scissors: Sharp fabric scissors for cutting fleece.
  • Pins or Clips: To hold pieces together without damaging the fabric.
  • Zipper (optional): If you prefer a zip-up hoodie.

3. Cutting the Fabric

Accurate cutting is crucial for a well-fitting hoodie. Follow these steps:

  • Prepare the Pattern: Lay out your pattern on the fleece fabric, ensuring the stretch direction aligns with the pattern’s specifications.
  • Pin or Clip: Secure the pattern to the fabric using pins or clips.
  • Cut with Precision: Carefully cut around the pattern, maintaining smooth, even edges.

4. Stitching Techniques

Fleece is relatively easy to sew, but specific techniques can help achieve a polished finish:

  • Seams: Use a straight stitch or a slight zigzag stitch to allow for some stretch. A serger can be used for professional-looking seams.
  • Hemming: A twin needle creates a clean, stretchy hem. Alternatively, use a zigzag stitch or a coverstitch machine.
  • Topstitching: Adds a decorative touch and reinforces seams. Use a longer stitch length for topstitching fleece.

5. Assembling the Hoodie

Follow these steps to put your hoodie together:

  • Join the Shoulders: Sew the shoulder seams first.
  • Attach the Sleeves: Pin and sew the sleeves to the armholes.
  • Sew the Side Seams: Stitch from the bottom hem to the sleeve cuff in one continuous seam.
  • Add the Hood: Sew the hood pieces together, then attach the hood to the neckline.
  • Finish with Cuffs and Hem: Attach the cuffs to the sleeves and hem the bottom of the hoodie.

6. Adding Personal Touches

Personalizing your fleece hoodie elevates it from basic to bespoke:

  • Embroidery: Add monograms, logos, or decorative designs.
  • Appliqué: Stitch on fabric shapes or patches for a unique look.
  • Contrasting Fabric: Use different colors or textures for the hood lining or pocket.
  • Pockets: Kangaroo or side seam pockets add both function and style.

Current Trends in Fleece Hoodie Design

1. Oversized Fit

Oversized hoodies are trending for their relaxed, comfortable fit. They provide extra warmth and a stylish, laid-back look. When sewing an oversized hoodie, consider using drop shoulders and extended lengths.

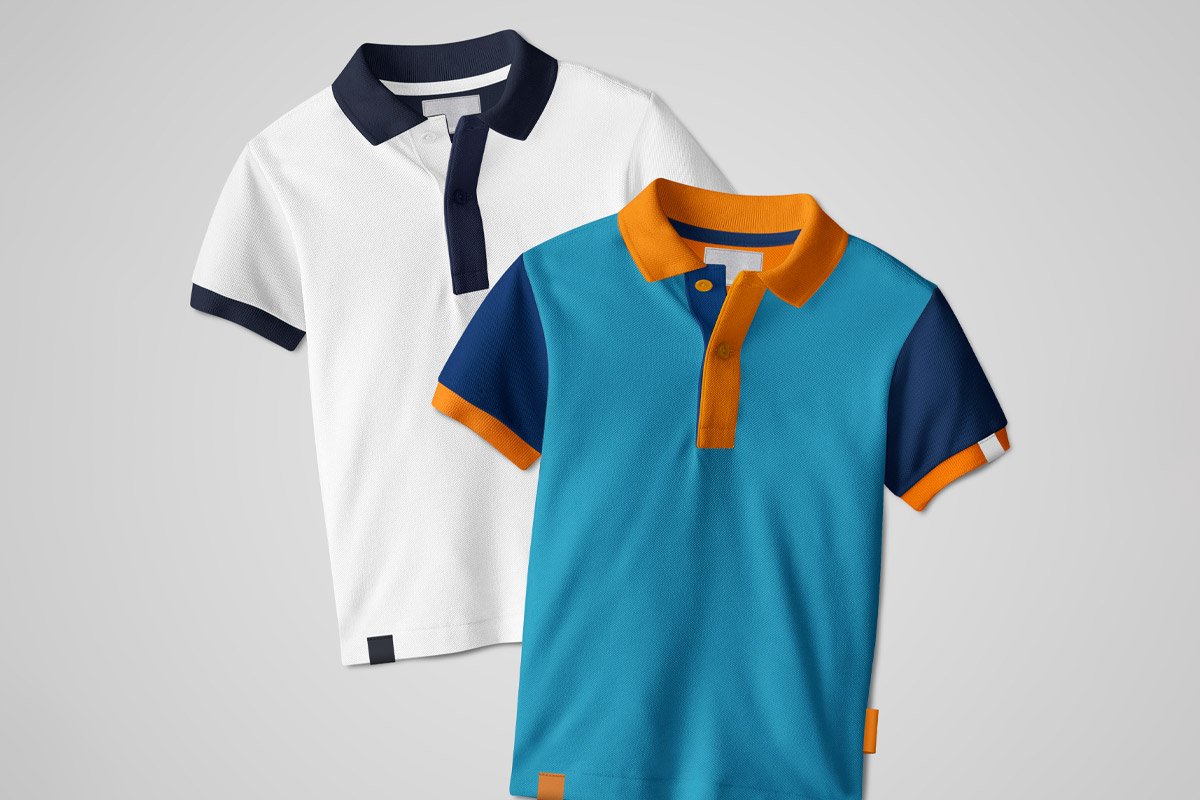
2. Color Blocking

Color blocking involves using contrasting colors for different parts of the hoodie, such as the sleeves, hood, and body. This trend adds a bold, modern twist to traditional designs.

3. Sustainable Fabrics

With increasing awareness of sustainability, eco-friendly fleece options made from recycled materials are gaining popularity. These fabrics offer the same warmth and comfort with a reduced environmental impact.

4. Graphic Designs

Printed or embroidered graphics, including logos, slogans, and artistic designs, are a popular way to personalize fleece hoodies. They allow for creative expression and can make a statement.

5. Tech-Integrated Features

Innovative designs incorporate tech features like headphone loops, hidden pockets, and even built-in charging capabilities. These functional additions cater to the modern, tech-savvy consumer.

Tips for Sewing the Perfect Fleece Hoodie

1. Pre-Wash the Fabric

Pre-washing the fleece fabric is essential to prevent shrinkage and remove any manufacturing residues. This step ensures that your hoodie retains its shape and size after washing.

2. Use the Right Needle

A ballpoint needle is ideal for sewing fleece as it slides between the fibers rather than piercing them, reducing the risk of skipped stitches and fabric damage.

3. Adjust Stitch Length

A longer stitch length (3-4 mm) works best for sewing fleece, providing flexibility and preventing the fabric from stretching out of shape.

4. Mind the Nap

Fleece has a directional nap, meaning the fibers lie in one direction. Ensure all pattern pieces are cut with the nap running the same way to maintain a consistent look and feel.

5. Press Seams Carefully

Fleece can melt or become misshapen with too much heat. Use a pressing cloth and a low heat setting on your iron to press seams gently.

6. Finish Raw Edges

While fleece doesn’t fray, finishing raw edges with a serger or zigzag stitch provides a clean, professional look and added durability.

Conclusion

Stitching the perfect fleece hoodie top combines practical sewing skills with creative design choices. By selecting the right materials, mastering essential techniques, and staying attuned to current trends, you can craft a cozy, stylish hoodie that stands out from the crowd. Whether you’re sewing for yourself or creating custom gifts, the time and effort invested in making a fleece hoodie will pay off in warmth, comfort, and personalized flair. Embrace the art of cozy couture and enjoy the satisfaction of wearing a garment made with care and creativity.

Polo Shirt Perfection: Elevating Your Style with Custom Stitching

Polo shirts are a timeless staple in the fashion world, offering a perfect blend of casual comfort and sophisticated style. What sets a polo shirt apart is its versatility and the ability to be customized through stitching. Custom stitching can transform a simple polo shirt into a unique, personalized garment that elevates your style. This guide delves into the art of custom stitching for polo shirts, exploring techniques, trends, and tips to achieve perfection.

The Timeless Appeal of Polo Shirts

Originally designed for sports, particularly tennis and polo, these shirts have evolved into a fashion essential suitable for various occasions. Their defining features—a soft collar, button placket, and breathable fabric—make them both practical and stylish. Custom stitching adds another layer of sophistication and personalization, making your polo shirt truly one-of-a-kind.

Why Custom Stitching?

Custom stitching offers several benefits:

  • Personalization: Express your unique style and personality through bespoke designs.
  • Branding: Perfect for businesses and teams to showcase logos and names.
  • Gift-Giving: A personalized polo shirt makes a thoughtful and unique gift.
  • Fashion Statement: Stand out with intricate patterns and designs that reflect current trends.

Essential Techniques for Custom Polo Shirt Stitching

1. Embroidery

Embroidery is the most popular custom stitching technique for polo shirts. It involves stitching designs onto the fabric using a needle and thread, often with the help of an embroidery machine.

How to do it:

  • Design Selection: Choose or create a design suitable for embroidery.
  • Stabilizer: Use a stabilizer to prevent the fabric from puckering.
  • Hooping: Place the shirt in an embroidery hoop to keep the fabric taut.
  • Stitching: Follow the design with the embroidery machine or by hand.

Common Uses: Logos, monograms, intricate patterns.

2. Appliqué

Appliqué involves stitching a piece of fabric onto the polo shirt to create a layered design.

How to do it:

  • Cut Fabric: Cut the desired shape from a contrasting fabric.
  • Placement: Position the fabric piece on the polo shirt.
  • Stitching: Secure the fabric with a tight zigzag or satin stitch around the edges.

Common Uses: Bold shapes, letters, and logos.

3. Monogramming

Monogramming is a classic technique involving the stitching of initials onto the shirt. It adds a touch of elegance and personalization.

How to do it:

  • Design the Monogram: Choose a font and layout for the initials.
  • Placement: Decide where to place the monogram (typically on the chest or sleeve).
  • Stitching: Use an embroidery machine to stitch the initials.

Common Uses: Personal initials, company initials.

4. Chain Stitching

Chain stitching creates a textured, linked effect and is ideal for decorative borders and outlines.

How to do it:

  • Draw the Design: Outline the design on the shirt.
  • Stitching: Use a chain stitch to follow the outline, creating a linked chain effect.

Common Uses: Decorative borders, text outlines.

Trends in Custom Polo Shirt Stitching

1. Minimalist Designs

Minimalism is a major trend, focusing on clean lines and simple designs. Subtle monograms or small logos are perfect for achieving this look. The key is to keep the design understated and elegant.

2. Bold Logos and Branding

For businesses and sports teams, bold logos and branding are popular. These designs often use vibrant colors and larger embroidery to make a statement.

3. Floral Patterns

Floral embroidery adds a touch of elegance and femininity to polo shirts. This trend involves intricate floral patterns stitched onto the shirt, often in vibrant or pastel colors.

4. Geometric Shapes

Geometric designs are modern and stylish, perfect for adding a contemporary touch to your polo shirt. These can include triangles, circles, and abstract patterns.

5. Textured Embroidery

Adding texture through techniques like 3D embroidery and raised stitching can make designs pop. This trend is particularly popular for logos and initials.

Choosing the Right Tools and Materials

To achieve perfect custom stitching on polo shirts, you need the right tools and materials:

  1. Embroidery Machine: A high-quality embroidery machine can handle intricate designs and multiple colors.
  2. Needles: Use embroidery needles suitable for the fabric of the polo shirt.
  3. Threads: High-quality embroidery threads in various colors. Polyester threads are durable and colorfast, while cotton threads offer a natural finish.
  4. Stabilizers: Stabilizers prevent the fabric from stretching and distorting. Choose tear-away or cut-away stabilizers based on the fabric and design.
  5. Embroidery Hoop: Keeps the fabric taut and ensures even stitching.
  6. Scissors: Sharp embroidery scissors for cutting threads and fabric.

Tips for Perfect Custom Stitching

1. Pre-Wash the Shirt

Pre-washing the polo shirt ensures that any shrinkage happens before you add your custom stitching. This prevents the design from becoming distorted after washing.

2. Choose the Right Thread

Select a thread color that complements or contrasts with the shirt fabric. Ensure that the thread type matches the desired finish and durability.

3. Use a Stabilizer

A stabilizer is crucial for maintaining the fabric’s integrity during stitching. It prevents puckering and stretching, especially on stretchy fabrics like those used in polo shirts.

4. Test Your Design

Before stitching on the actual shirt, test your design on a fabric scrap. This allows you to adjust the settings and make sure the design looks as intended.

5. Maintain Even Tension

Consistent tension is vital for uniform stitching. Adjust the machine settings as needed to avoid loose or overly tight stitches.

6. Trim Excess Threads

After completing the stitching, trim any excess threads carefully. This ensures a clean and professional finish.

7. Iron the Finished Design

Gently iron the finished design to set the stitches and remove any wrinkles. Use a pressing cloth to protect the embroidery.

Conclusion

Custom stitching on polo shirts offers endless possibilities for personalization and style. Whether you’re looking to add a subtle monogram, a bold logo, or an intricate design, the right techniques and tools can help you achieve perfection. By staying updated on current trends and mastering essential stitching techniques, you can transform a simple polo shirt into a unique fashion statement. Embrace the art of custom stitching and elevate your style with a perfectly crafted polo shirt.

The Ultimate Guide to Custom T-Shirt Stitching: Trends and Techniques

Custom t-shirt stitching is more than just a way to personalize clothing; it’s a fusion of art, fashion, and functionality that allows individuals to express their unique style. This guide explores the latest trends and techniques in custom t-shirt stitching, providing insights for both beginners and seasoned enthusiasts.

The Evolution of Custom T-Shirt Stitching

Custom t-shirt stitching has evolved significantly over the years. Originally, it was a manual process carried out by skilled artisans. Today, advancements in technology have made it more accessible and diverse. Here’s a brief overview of its journey:

  1. Hand Stitching: The earliest form of custom stitching, involving intricate designs created by hand. This method is still appreciated for its personal touch and craftsmanship.
  2. Machine Embroidery: Introduced in the 19th century, machine embroidery revolutionized custom stitching by making it faster and more consistent.
  3. Digital Embroidery: The modern era has seen the rise of digital embroidery machines, which allow for complex designs to be uploaded and stitched with precision.

Current Trends in Custom T-Shirt Stitching

1. Minimalist Designs

Minimalism has taken the fashion world by storm, and custom t-shirt stitching is no exception. Simple, clean lines and understated designs are popular, focusing on subtlety rather than extravagance. This trend is perfect for those who prefer a sophisticated and timeless look.

2. Bold Typography

Statement t-shirts with bold, stitched typography are a major trend. These designs often feature inspirational quotes, slogans, or personalized messages. The stitching adds a tactile element that screen printing cannot replicate.

3. Intricate Patterns and Florals

Detailed patterns and floral designs have become increasingly popular, especially among those who appreciate artistry in their clothing. These intricate designs often require advanced stitching techniques and a keen eye for detail.

4. 3D Embroidery

3D embroidery is a technique that adds depth and texture to designs, making them stand out. This trend is particularly popular for logos and branding on t-shirts, providing a unique, eye-catching effect.

5. Sustainable and Ethical Stitching

As sustainability becomes a significant concern in fashion, many are turning to eco-friendly materials and ethical stitching practices. Organic threads and dyes, along with fair labor practices, are becoming standard expectations in custom t-shirt production.

Essential Techniques for Custom T-Shirt Stitching

1. Backstitch

Backstitch is a basic yet essential technique used in custom stitching. It provides a solid and continuous line, making it ideal for outlines and detailed designs.

How to do it:

  • Start by bringing the needle up through the fabric.
  • Move the needle backward to make the first stitch.
  • Bring the needle up a short distance from the end of the previous stitch and repeat.

2. Satin Stitch

Satin stitch is perfect for filling in shapes with a smooth, satin-like appearance. It’s commonly used for logos and text.

How to do it:

  • Outline the shape you want to fill.
  • Bring the needle up at one edge of the shape and down directly opposite.
  • Continue this process, keeping the stitches close together for a smooth finish.

3. Chain Stitch

Chain stitch creates a textured, linked effect, making it ideal for decorative borders and lines.

How to do it:

  • Start by making a small loop with your thread.
  • Bring the needle up inside the loop and then down outside the loop, pulling tight to form the chain.
  • Repeat this process, linking each new loop into the previous one.

4. French Knots

French knots add dimension and texture to designs, often used for dot effects or small accents.

How to do it:

  • Bring the needle up through the fabric and wrap the thread around the needle twice.
  • Hold the wraps in place and insert the needle back into the fabric close to the original point.
  • Pull through gently to create a knot on the surface.

5. Appliqué

Appliqué involves stitching a piece of fabric onto the t-shirt, creating a layered effect. This technique is excellent for adding shapes and patterns that stand out.

How to do it:

  • Cut the desired shape from a different fabric.
  • Place it on the t-shirt and stitch around the edges using a tight zigzag or satin stitch.

Tools and Materials Needed

To get started with custom t-shirt stitching, you’ll need the following tools and materials:

  1. Needles: Different sizes for various stitch types.
  2. Threads: Cotton, polyester, and silk threads in various colors.
  3. Embroidery Hoop: Keeps the fabric taut and helps maintain tension.
  4. Scissors: Sharp scissors for cutting threads and fabric.
  5. Fabric Markers: For outlining designs before stitching.
  6. Stabilizer: A backing material that prevents the fabric from stretching and distorting during stitching.

Tips for Successful Custom T-Shirt Stitching

1. Choose the Right Fabric

The type of fabric you choose affects the ease and outcome of your stitching. Cotton is a popular choice due to its durability and ease of handling.

2. Pre-Wash the T-Shirt

Pre-washing the t-shirt prevents shrinkage and ensures that the stitches remain intact after washing.

3. Use a Stabilizer

A stabilizer is essential, especially for stretchy fabrics like jersey. It provides support and prevents puckering.

4. Practice on Scraps

Before working on the actual t-shirt, practice your stitches on fabric scraps to perfect your technique.

5. Follow a Design Template

Using a template ensures that your design is symmetrical and positioned correctly. You can create your own or find templates online.

6. Maintain Even Tension

Consistent tension is crucial for uniform stitches. Avoid pulling the thread too tight or leaving it too loose.

7. Take Breaks

Stitching can be time-consuming and strain your eyes and hands. Take regular breaks to rest and prevent fatigue.

Conclusion

Custom t-shirt stitching is a rewarding and creative way to personalize your wardrobe. By staying informed about the latest trends and mastering essential techniques, you can create unique and stylish pieces that reflect your personality. Whether you’re a beginner or an experienced stitcher, the tips and insights provided in this guide will help you on your journey to crafting beautiful custom t-shirts. Happy stitching!